01
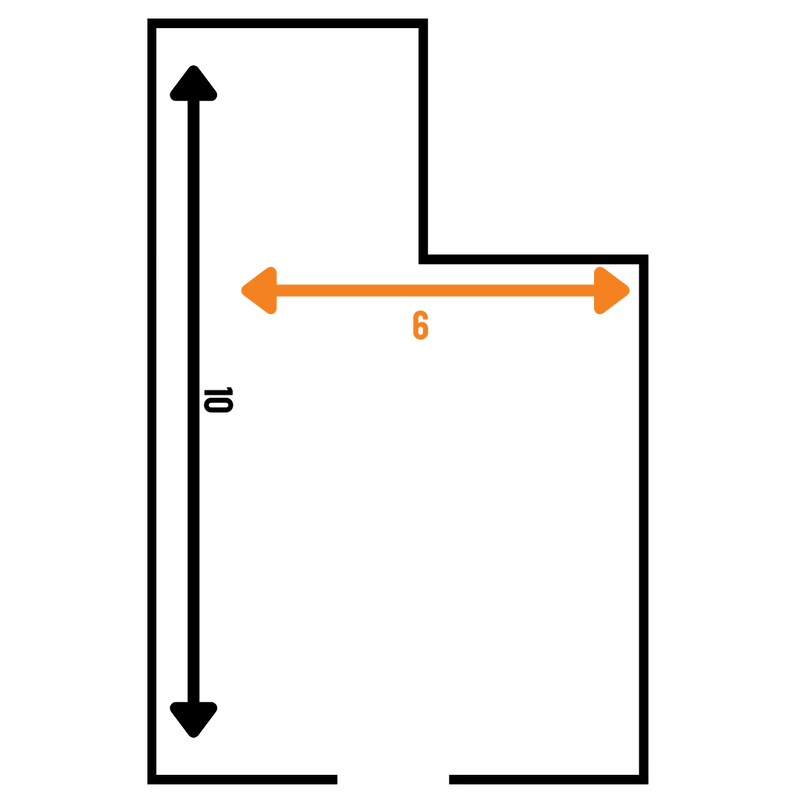
Always start by measuring the length of the room at the very longest point. Don’t just go wall to wall if there’s an alcove or a little bump out - include that too.

Choosing your new floor is exciting — but before you click “buy,” we need to make sure it’s going to fit your room perfectly.
Don’t worry, this isn’t complicated. With a few simple steps, you’ll have the right measurements, avoid wasted money, and make fitting day go smoothly.
I’ve helped thousands of people measure their rooms, and I can tell you — doing it right now saves a lot of stress later. Let’s walk through it together.
TAPE MEASURE
(5–8 metres is ideal)
(or print our measuring sheet)
(or your phone)
(to help measure - if it's a big room)
Tip: If the room’s an odd shape, having someone hold the other end of the tape makes life a lot easier.
I’ve been in and out of more rooms than I can count, and I’ll tell you this — getting your measurements right from the start makes the whole flooring job a breeze. This easy guide walks you through the exact steps I use on every home I visit. No fancy tools, no confusing jargon — just a simple, friendly way to make sure you order the perfect amount of flooring every time.
01
Always start by measuring the length of the room at the very longest point. Don’t just go wall to wall if there’s an alcove or a little bump out - include that too.
02
Next, I measure the width at the widest point. Even if one wall juts out slightly, I count it in. We want this right the first time.
03
Once I’ve got length and width, I multiply them together to get the total square metres. This is the foundation for ordering the right amount of flooring.
04
Here’s where experience pays off — I always add 5–10% extra for cutting and waste. It’s far better to have a spare board or two than be short when you’re halfway through the job.
05
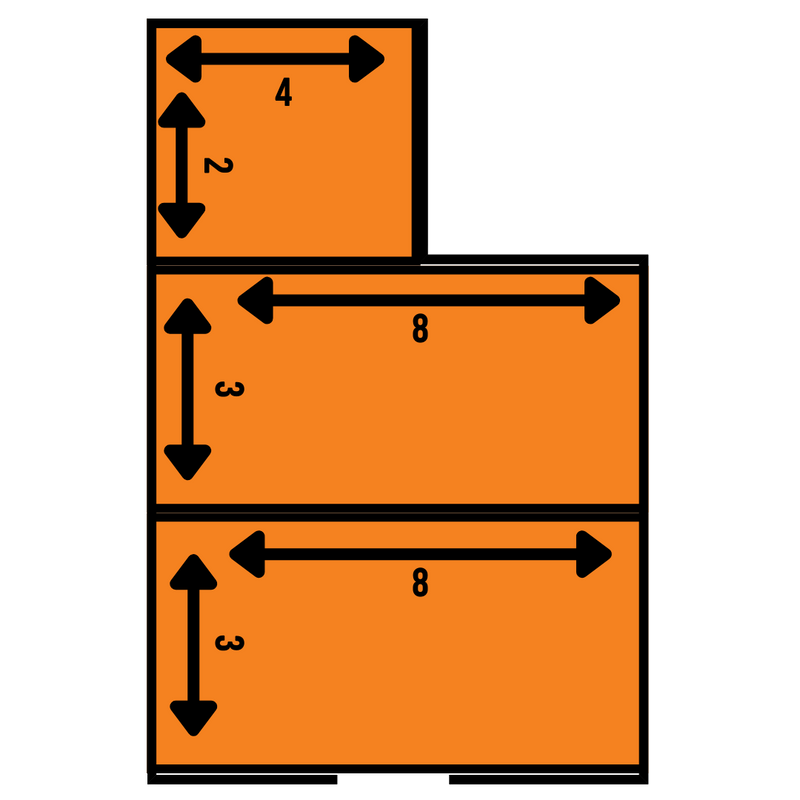
If the room’s not a perfect rectangle, I break it down into smaller rectangles on paper, measure each one, work out the area, then add them all up. It’s just like putting a jigsaw together — easy once you see it.
06
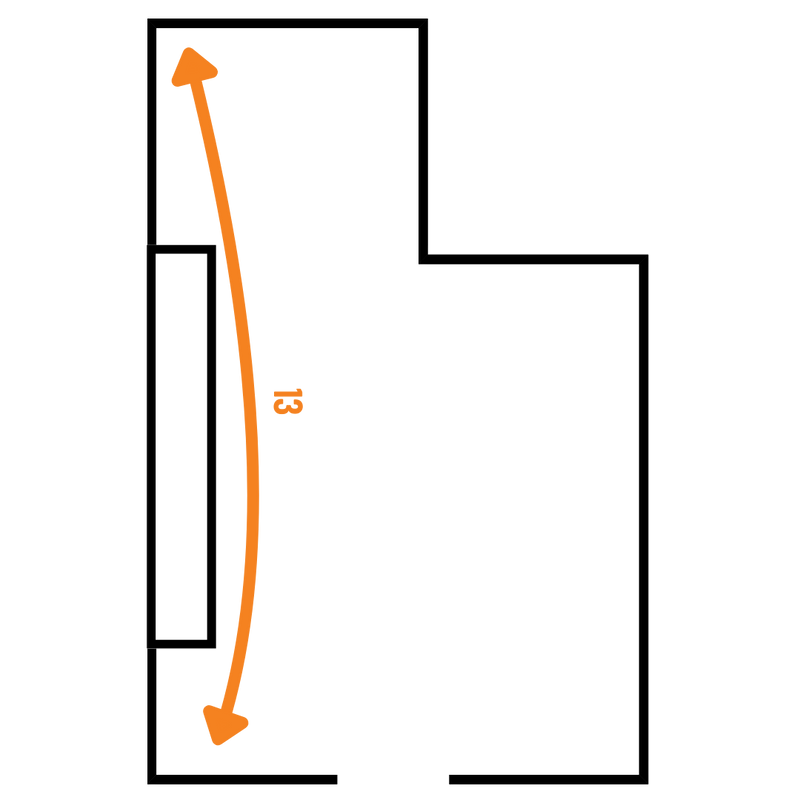
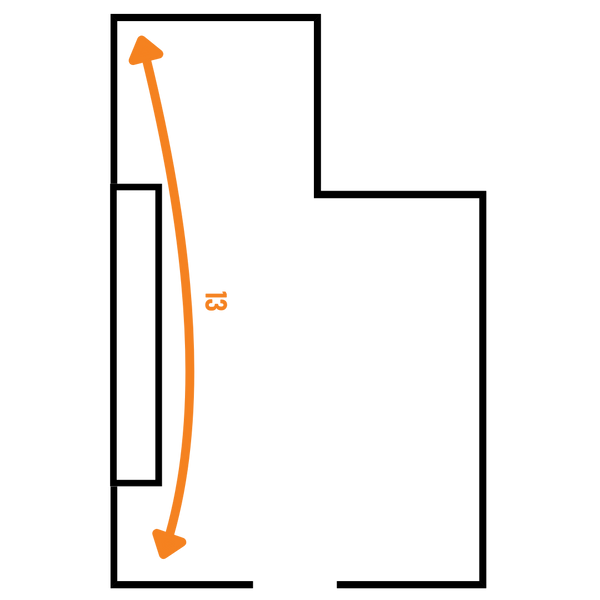
I make sure to measure around alcoves, doorways, and recesses, and if it’s patterned flooring, I allow 10–15% extra so the design lines up perfectly.
07
My golden rule? Measure twice, order once. Rounding up is always safer than rounding down — it’s the difference between a perfect job and a stressful fitting day.


01
Always start by measuring the length of the room at the very longest point. Don’t just go wall to wall if there’s an alcove or a little bump out - include that too.

02
Next, I measure the width at the widest point. Even if one wall juts out slightly, I count it in. We want this right the first time.

03
Once I’ve got length and width, I multiply them together to get the total square metres. This is the foundation for ordering the right amount of flooring.

04
Here’s where experience pays off — I always add 5–10% extra for cutting and waste. It’s far better to have a spare board or two than be short when you’re halfway through the job.

05
If the room’s not a perfect rectangle, I break it down into smaller rectangles on paper, measure each one, work out the area, then add them all up. It’s just like putting a jigsaw together — easy once you see it.
06
I make sure to measure around alcoves, doorways, and recesses, and if it’s patterned flooring, I allow 10–15% extra so the design lines up perfectly.

07
My golden rule? Measure twice, order once. Rounding up is always safer than rounding down — it’s the difference between a perfect job and a stressful fitting day.
| ROOM SHAPE | WASTE % |
|---|---|
| Perfect square/rectangle | 5% |
| Irregular/L-shape | 10% |
| Patterned flooring | 10-15% |